Incident management involves detecting, responding to, and resolving unplanned events efficiently across systems and teams. It is important for organizations aiming to reduce downtime, mitigate risks, and maintain operational resilience.
Incident management platforms like Rootly are designed to streamline and automate response workflows for engineering, operations, and security teams. Integrating Rootly with Wazuh connects Wazuh real-time threat detection with Rootly automated incident response. Wazuh monitors endpoints, servers, and applications for indicators of compromise, unauthorized changes, and policy violations. When alerts are triggered on Wazuh, they are forwarded to Rootly, where incidents are created and routed through predefined workflows.
This integration reduces response time, eliminates manual alert triage, and ensures incidents are handled consistently across teams. This blog post explains how to integrate Rootly with Wazuh to enable faster, more coordinated incident response.
Infrastructure
We use the following infrastructure for this integration:
- A pre-built, ready-to-use Wazuh OVA 4.14.2, which includes the Wazuh central components (Wazuh server, Wazuh indexer, and Wazuh dashboard). Follow this guide to download and set up the Wazuh virtual machine.
- A Windows 11 endpoint with Wazuh agent 4.14.2 installed and enrolled in the Wazuh server. This endpoint is required to simulate a high-severity alert.
- A Rootly workspace.
Configuration
To achieve this integration, we configure the Wazuh server to forward alerts to the Rootly workspace using an incoming webhook URL and a custom Python script.
Generate Webhook on Rootly
We create an account and generate an incoming webhook URL, which we use in the Python integration script. Follow the steps below to generate an incoming webhook URL on Rootly.
- Sign in to the Rootly workspace.
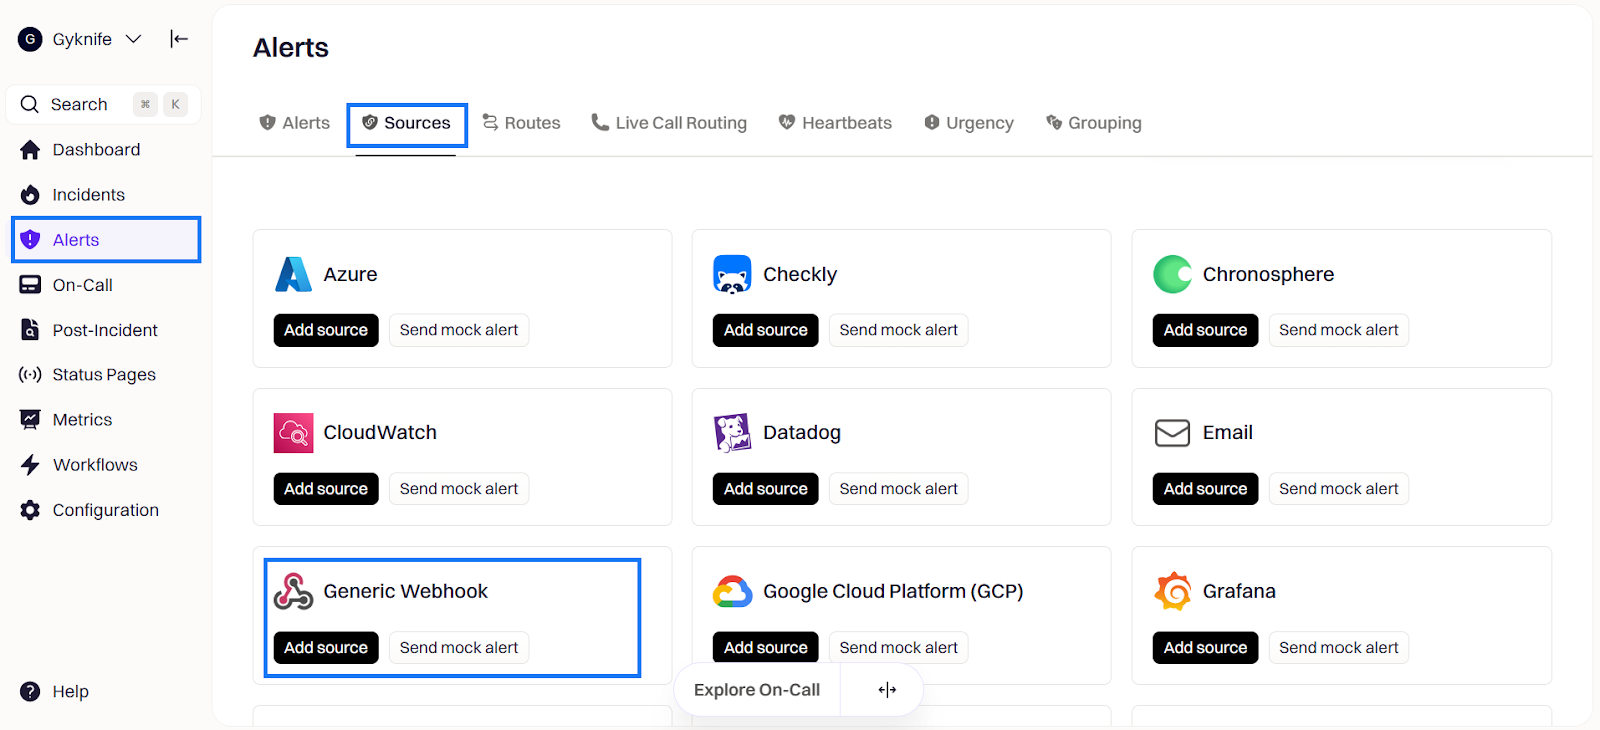
- Navigate to Alerts > Sources, then click on Add source under Generic Webhook on the Rootly workspace.
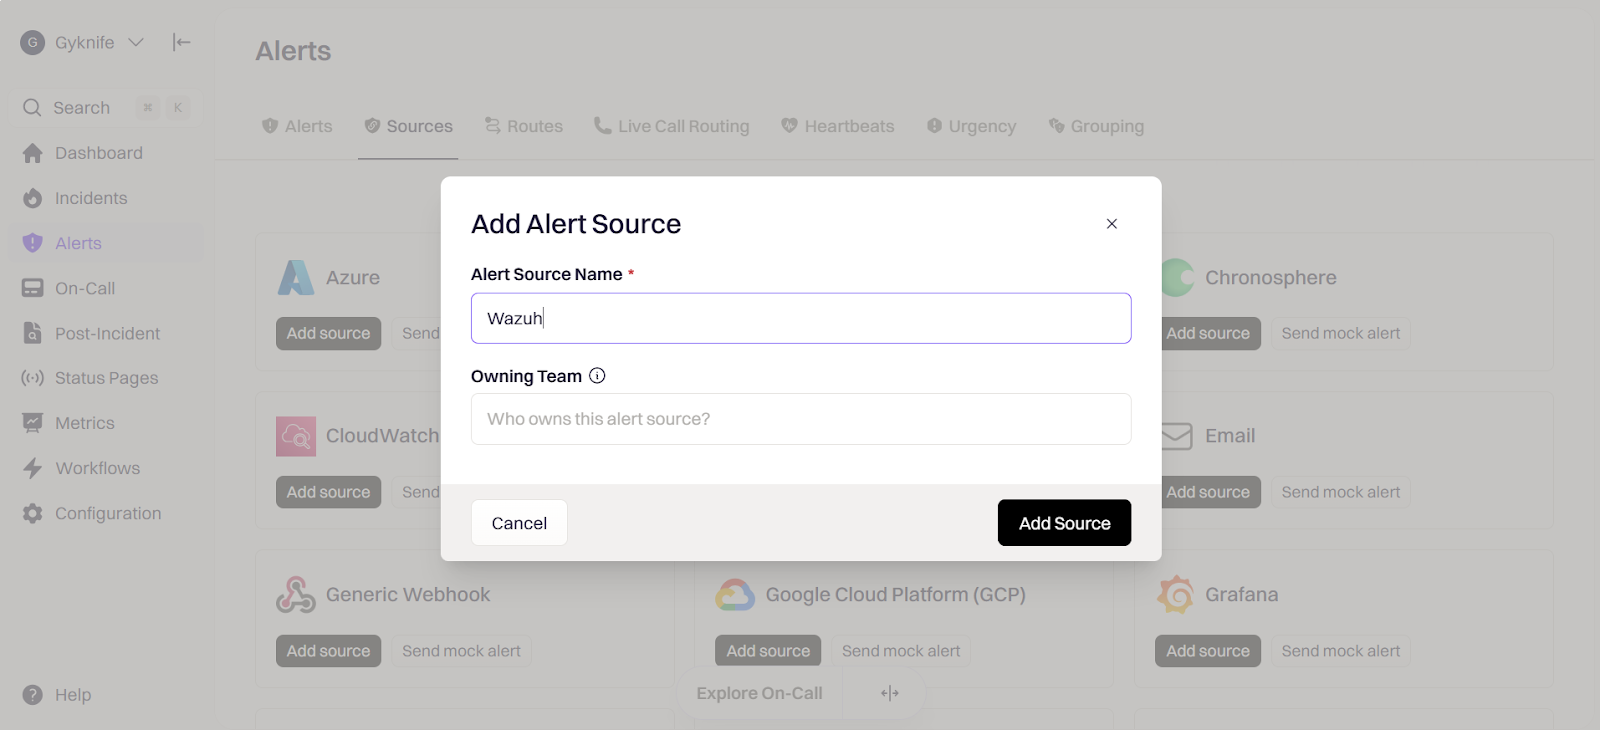
- Enter an alert source name
Wazuh, and click on Add Source.
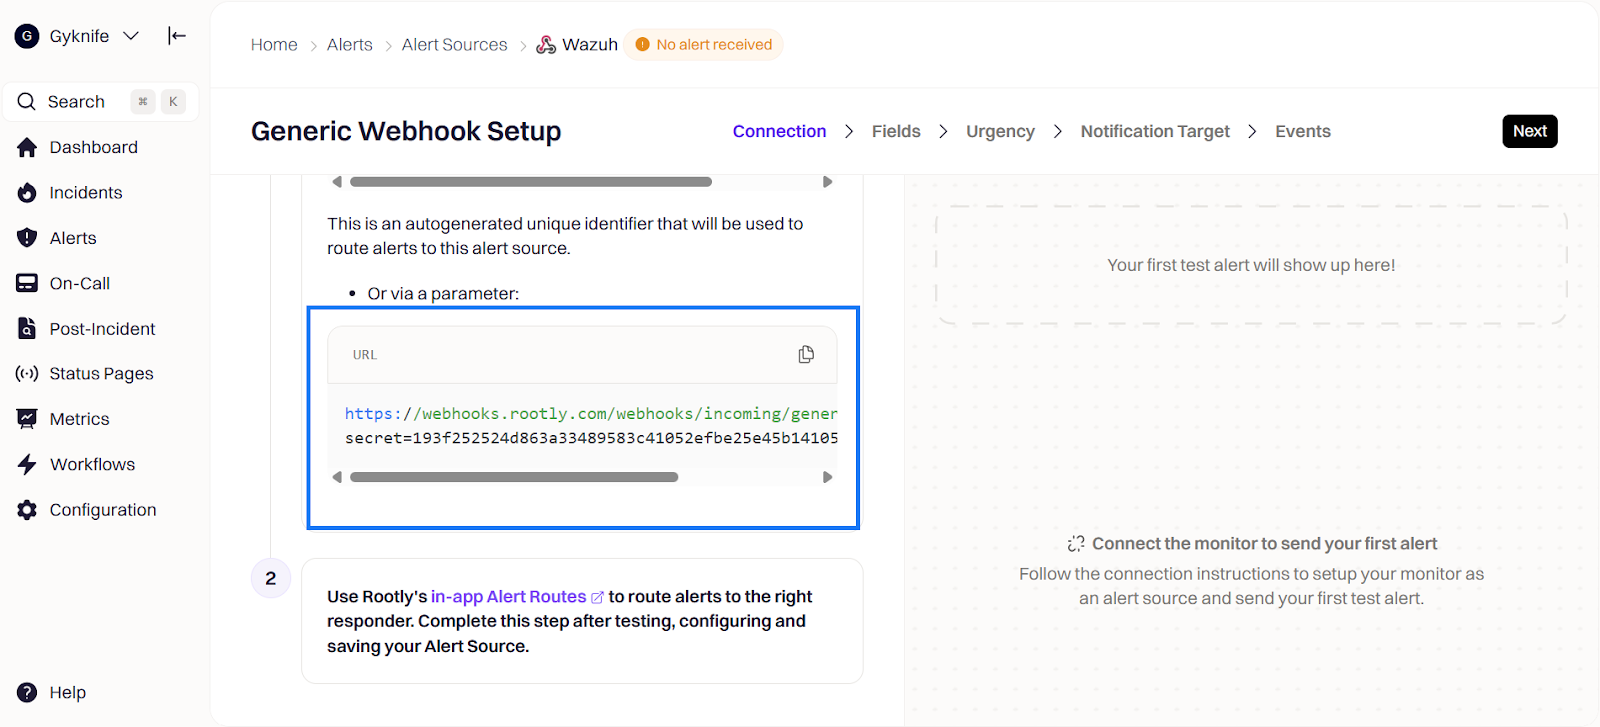
- Note the webhook URL generated. The Webhook URL will be used in the next section when configuring the Wazuh server. Click on the Events tab, then click on the Finish button.
Configure alert fields
On the Rootly workspace, we configure the alert fields for the incoming webhook payloads (Wazuh alerts). Follow the steps below to create the alert fields on Rootly.
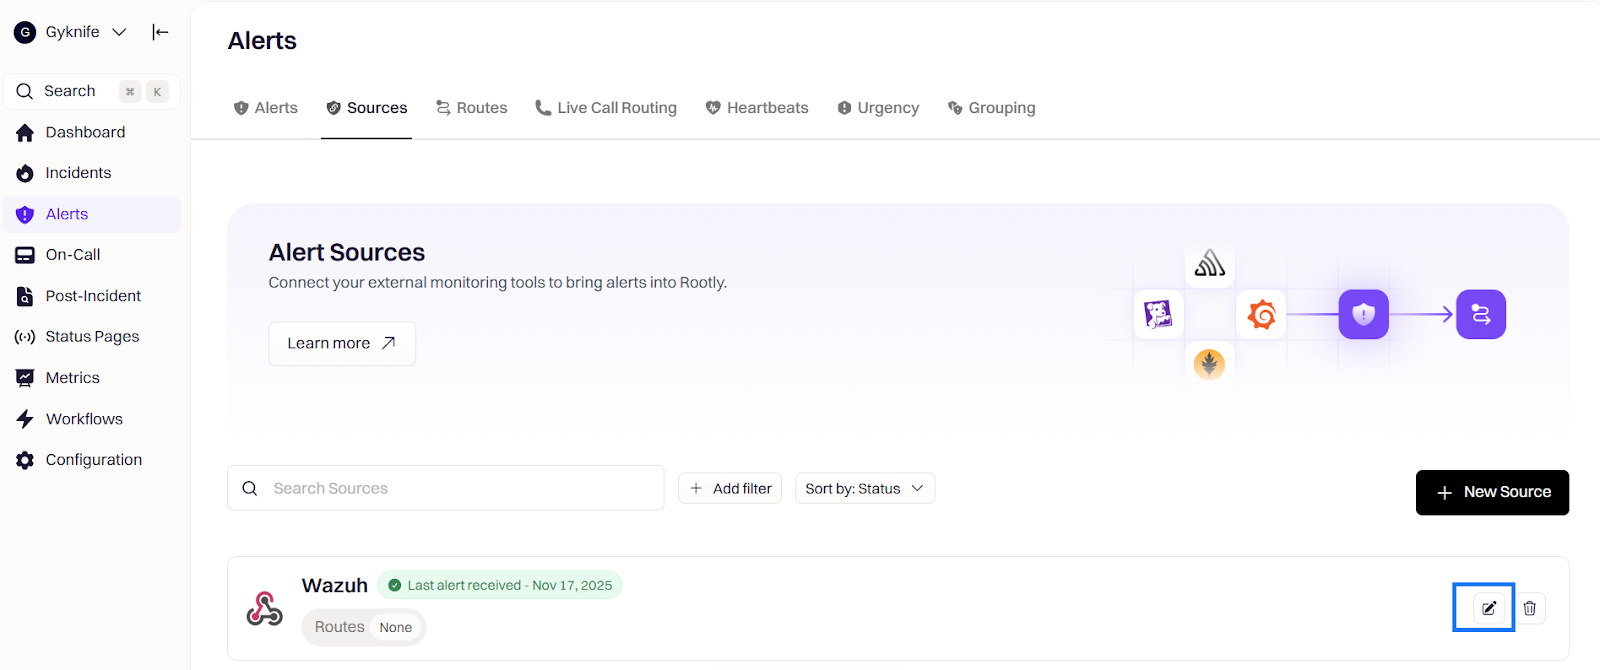
- Navigate to Alerts > Sources and click on the edit icon for the alert source we created previously on your Rootly workspace.
- Click on the Field tab and use the Add Field button to create the following fields and values:
- Field name
Title, value{{ alert.data.title }}. - Field name
Description, value{{ alert.data.title }}. - Field name
Source Link, value{{ alert.data.source }}. - Field name
Computer name, value{{ alert.data.Computer }}. - Field name
SourceIP, value{{ alert.data.Agent_IP }}. - Field name
Log, value{{ alert.data.summary }}. - Field name
Time, value{{ alert.data.Timestamp }}.
- Field name
Note
Use the Add Field button to add the Computer name. SourceIP, Log, and Time fields.
3. Click on the Save button to update the webhook configuration.
Wazuh server configuration
Perform the following steps on the Wazuh server to configure the Wazuh Integrator module and the integration script:
- Run the command below to install the dependencies required for the integration script. Use the
piputility to installrequests.
# /var/ossec/framework/python/bin/pip3 install requests
- Create the custom integration script
custom-rootlyin the/var/ossec/integrationsdirectory and add the following content to it.
| Warning: This script is a proof of concept (PoC). Review and validate it to ensure it meets the operational and security requirements of your environment |
#!/var/ossec/framework/python/bin/python3.10
# Wazuh → Rootly integration script

import json
import sys
import time
import os

try:
    import requests
except ImportError:
    print("Module 'requests' not found. Install with: pip install requests")
    sys.exit(1)

# === CONFIGURATION ===
ROOTLY_WEBHOOK_URL = "<ROOTLY_WEBHOOK_URL>"

debug_enabled = True
pwd = os.path.dirname(os.path.dirname(os.path.realpath(__file__)))
log_file = f"{pwd}/logs/integrations-rootly.log"
if not os.path.exists(log_file):
    os.makedirs(os.path.dirname(log_file), exist_ok=True)
    with open(log_file, "w") as f:
        f.write("=== Rootly Integration Log Start ===\n")

now = time.strftime("%a %b %d %H:%M:%S %Z %Y")

def main(args):
    debug("# Wazuh → Rootly script started")

    alert_file = args[1]
    debug(f"# Reading alert from: {alert_file}")

    with open(alert_file, 'rb') as f:
        last_line = f.read().decode('utf-8').splitlines()[-1]
        if last_line.strip():
            alert = json.loads(last_line)
        else:
            debug("Alert file is empty.")
            return

    payload = build_payload(alert)
    debug("# Sending payload to Rootly")
    debug(payload)

    send_to_rootly(payload)

def debug(msg):
    if debug_enabled:
        msg = f"{now}: {msg}\n"
        print(msg)
        with open(log_file, "a") as f:
            f.write(msg)

def build_payload(alert):
    rule = alert.get("rule", {})
    agent = alert.get("agent", {})
    description = rule.get("description")
    level = str(rule.get("level"))
    agent_name = agent.get("name", "Unknown")
    agent_ip = agent.get("ip", "Unknown")
    location = alert.get("location", "N/A")
    timestamp = alert.get("timestamp", "N/A")
    full_log = alert.get('full_log')
    computer = (
    alert.get('data', {}).get('win', {}).get('system', {}).get('computer')
    or alert.get('agent', {}).get('name')
    or "N/A"
)

    severity = map_severity(level)

    return {
        "title": f"Wazuh Alert: {description}",
        "Timestamp": timestamp,
        "Agent_IP": agent_ip,
        "Computer": computer,
        "summary": f"""
Timestamp: {timestamp}
Agent_Name: {agent_name}
Agent_IP: {agent_ip}
Computer: {computer}
Location: {location}
Log: {full_log}
Level: {level}
""",
        "source": "Wazuh",
        "severity": severity
    }

def map_severity(level):
    try:
        level = int(level)
        if level >= 12:
            return "SEV0" # High
        elif level >= 8:
            return "SEV1" #Medium
        else:
            return "SEV2" #Low

    except:
        return "unknown"

def send_to_rootly(payload):
    try:
        response = requests.post(
            ROOTLY_WEBHOOK_URL,
            headers={"Content-Type": "application/json"},
            json=payload
        )
        debug(f"Rootly response: {response.status_code} - {response.text}")
    except Exception as e:
        debug(f"Error sending to Rootly: {e}")

if __name__ == "__main__":
    try:
        main(sys.argv)
    except Exception as e:
        debug(f"Unhandled exception: {e}")
Replace:
<ROOTLY_WEBHOOK_URL>with the webhook URL generated from the Rootly dashboard.
- Run the command below to update the permissions and ownership of the
custom-rootlyscript:
# chmod 750 /var/ossec/integrations/custom-rootly
# chown root:wazuh /var/ossec/integrations/custom-rootly
Wazuh dashboard
Perform the steps below to add rules to the Wazuh server to detect the activities related to Cephalus ransomware.
- Click on the upper left menu ☰ and navigate to Server management > Rules.
- Click on Manage rules files, then search for
local_rulesand click on the edit icon. - Append the rule below to the
local_rules.xmlfile to generate a sample alert with severity level 12. This is required to demonstrate the type of alerts to be forwarded to Rootly for incident ticket creation.
<group name="rootly_integration">
  <rule id="101556" level="12">
    <if_sid>60105</if_sid>
    <field name="win.system.eventID">^529$|^4625$</field>
    <description>Logon Failure - Unknown user or bad password</description>
    <mitre>
      <id>T1531</id>
    </mitre>
  </rule>
</group>
- Click on Reload to apply the changes.
- Click on the upper left menu ☰ and navigate to Server management > Settings > Edit configuration.
- Add the below configuration to the Manager configuration:
<ossec_config>
  <!-- Rootly -->
  <integration>
    <name>custom-rootly</name>
    <level>12</level> <!-- send only level 12+ alerts -->
    <alert_format>json</alert_format>
  </integration>
</ossec_config>
Where:
<name>specifies the name of the application to integrate with. In this case, Rootly.<level>specifies the severity of the alerts to be considered for Rootly incident creation.<alert_format>specifies that the alerts are received in JSON format.
Note
We configured this integration to send alerts with severity levels that are equal to or greater than 12. You can modify this according to your needs and preferences.
- Click on Restart Manager and Confirm to apply the changes.
Test the integration
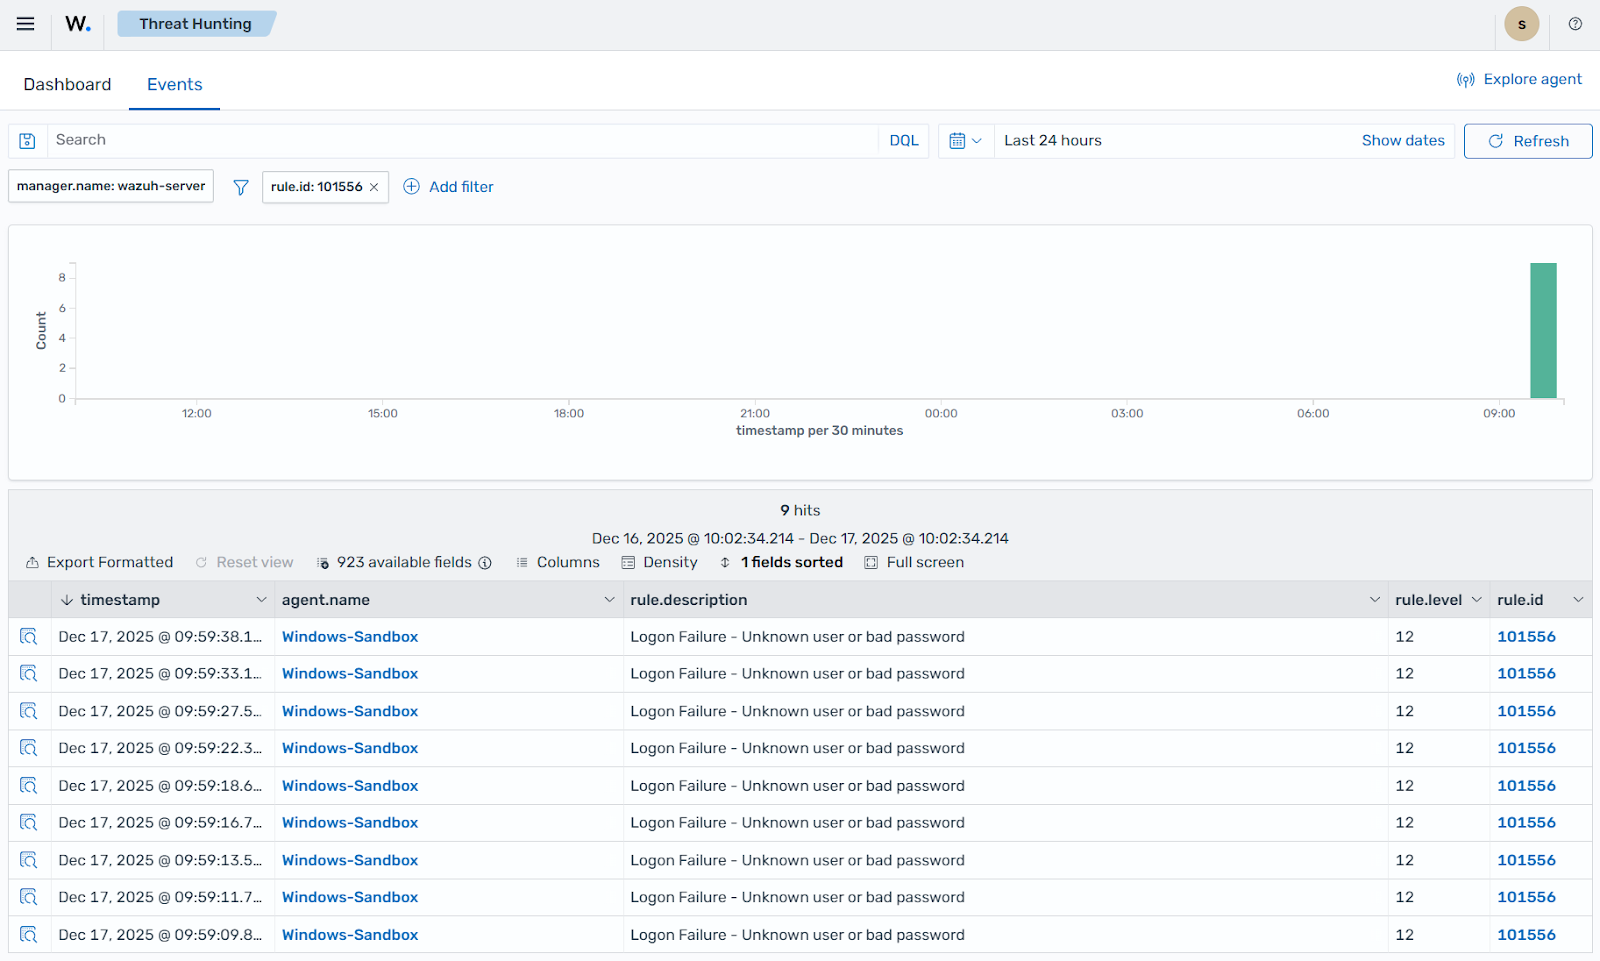
To test this integration, we attempt to log in with incorrect credentials on the Windows 11 endpoint, which triggers a high-severity alert (level 12). We then visualize this alert on the Wazuh dashboard and confirm that an incident ticket has been successfully created on the Rootly incidents dashboard.
Wazuh dashboard
View the alerts generated by this simulation on the Wazuh dashboard:
- Navigate to Threat intelligence > Threat Hunting.
- Click + Add filter. Then filter by
rule.id. - In the Operator field, select
is. - Search and select rule
ID 101556in the Values field. - Click Save.
Rootly dashboard
The high-severity alert seen on the Wazuh dashboard is forwarded to the Rootly workspace to create an incident ticket. Follow the steps below to view and manage the incident ticket.
- Log in to your Rootly workspace.
- Navigate to Alerts to view the alerts from Wazuh.
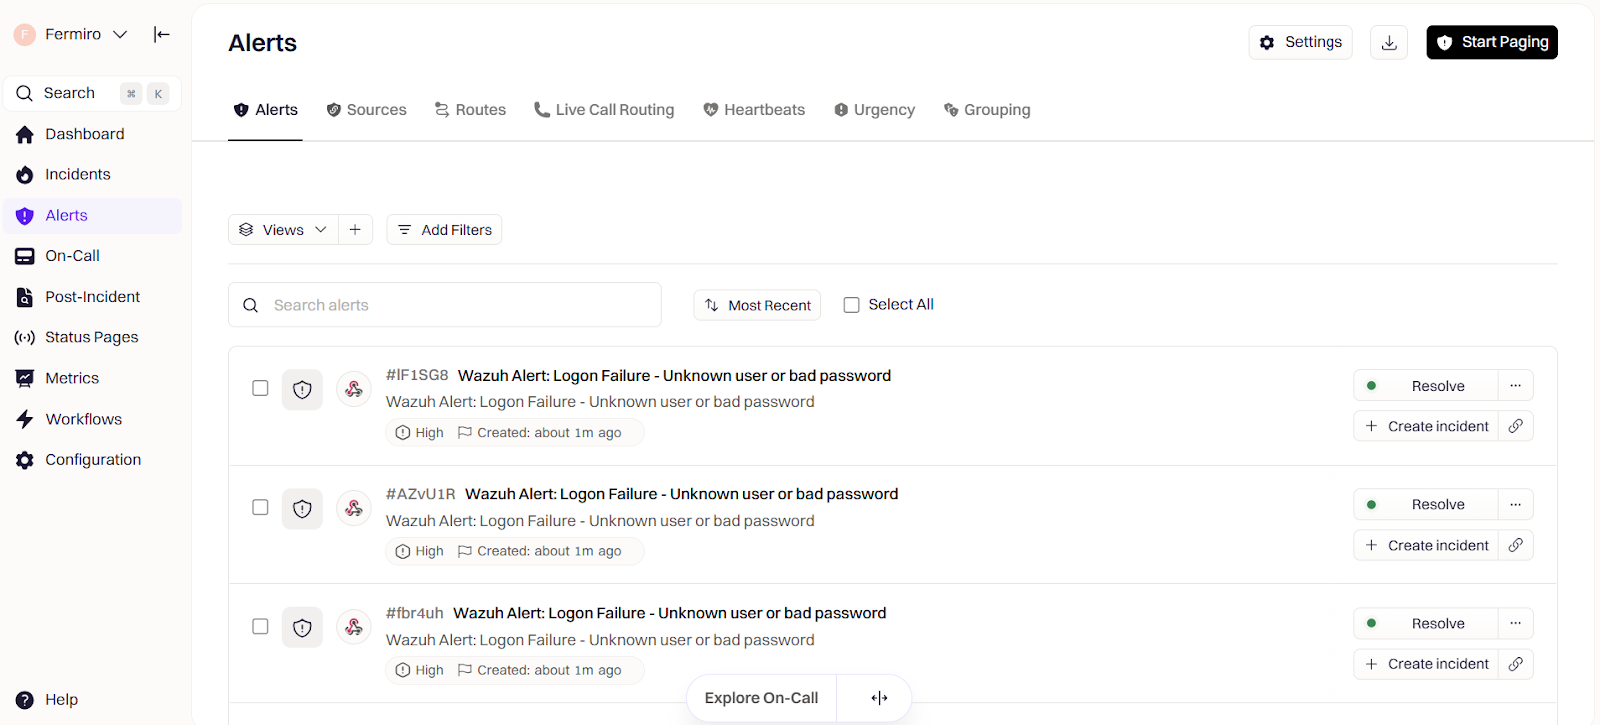
From the Rootly workspace, you can create and assign incidents, track response times, and resolve issues efficiently through streamlined workflows.
Conclusion
This blog post demonstrates how to integrate Rootly with Wazuh. This integration bridges the gap between security monitoring and incident response by automatically forwarding Wazuh alerts to Rootly for incident creation. It streamlines incident tracking, ensures timely response to threats, and fosters coordination across security, engineering, and operational teams.
By leveraging this integration, organizations can reduce Mean Time To Respond (MTTR), enforce accountability, and improve operational resilience. Rootly’s incident automation features complement Wazuh detection capabilities, resulting in faster resolution, reduced manual overhead, and enhanced visibility into critical security events.
Discover more about Wazuh by exploring our other blog posts and becoming part of our growing community.