
The global pandemic in 2020 gave rise to more companies adopting remote working tools, services, and collaboration solutions. But organizations that utilize remote work services expose themselves to a wider range of potential threats from malicious actors. Remote users can use OpenVPN to safely connect to a private network and all its resources, including files, printers, and databases, from a distance via the internet. It can also be used to expand the private network across a public network and securely link numerous sites together (the internet).
The term VPN is an acronym for Virtual Private Network. The concept of VPN involves allowing access to the private network of an organization from public sources such as the internet. Traffic from the source is encrypted while in transit, allowing the organization to meet the confidentiality facet of the CIA triad.
The challenge for any organization utilizing OpenVPN or any other VPN provider lies in protecting authorized users from an account compromise. An organization’s VPN users are prime targets for malicious actors because a compromised account will grant access to the victim’s network. Hence, organizations need to set strict policies and ensure that they constantly monitor such a critical service. Organizations may enforce VPN usage policies for workers within a geographic location or at a specific timeframe of the day. It is also possible to set up monitoring to make sure users comply with the set rules.
In this blog post, we configure Wazuh to monitor the location of your organization’s OpenVPN users by using its’s GeoIP feature.
Infrastructure
1. A single-node Wazuh server setup on an Ubuntu 20.04 server. We used the installation guide to set this up.
2. An Ubuntu 20.04 server with an OpenVPN access server installed. The installation steps for OpenVPN are provided here in the Installing OpenVPN access server section of this blog post. We also installed the Wazuh agent on this server using the Wazuh agent installation guide.
3. A Windows, Linux, Mac, Android, or IOS device to connect to the OpenVPN server using the OpenVPN client utility. Users with local OpenVPN servers that can not be publicly accessible can skip this requirement. Sample logs that simulate OpenVPN connection traffic are provided below in the testing the OpenVPN connection for local servers section.
In our scenario, the OpenVPN access server is publicly accessible from the internet via port 943. This will enable us to get the public IP addresses of the connecting OpenVPN client. Users without a public IP address can still follow the steps in this blog post by configuring the OpenVPN server on a local network.
The illustration below shows the infrastructure we used for our scenario.

Configuration
OpenVPN access server
OpenVPN is a company that provides VPN services to individual users and businesses. This service enables businesses to effectively protect their assets in a flexible, affordable, and scalable manner. Once set up, accounts are created for client connection across multiple platforms. The following steps can be used to set up the OpenVPN access server.
Installing OpenVPN access server
1. Run the following commands as the root user:
# apt update && apt -y install ca-certificates wget net-tools gnupg
# wget -qO - https://as-repository.openvpn.net/as-repo-public.gpg | apt-key add -
# echo "deb http://as-repository.openvpn.net/as/debian focal main">/etc/apt/sources.list.d/openvpn-as-repo.list
# apt update && apt -y install openvpn-as
+++++++++++++++++++++++++++++++++++++++++++++++
Access Server 2.11.1 has been successfully installed in /usr/local/openvpn_as
Configuration log file has been written to /usr/local/openvpn_as/init.log


Access Server Web UIs are available here:
Admin  UI: https://<OPENVPN_SERVER_IP>:943/admin
Client UI: https://<OPENVPN_SERVER_IP>:943/
To login please use the "openvpn" account with "YourSecretPassword" password.
(password can be changed on Admin UI)
+++++++++++++++++++++++++++++++++++++++++++++++
2. Login to the OpenVPN web admin UI using the link and password from the output above. The default admin username is openvpn.

3. Click on the User Permissions under the User Management tab and create a user as shown in the image below. A user with the name client-user was created for our scenario. Please note the name of the user created. This username will be used in a later section.

4. Generate a license key if you are a free user. The license key can only allow 2 VPN connections. The steps to generate and apply the license key are provided in the official OpenVPN license guide.
Configuring the Wazuh agent to read OpenVPN access server logs
1. Add the configuration below to the /var/ossec/etc/ossec.conf file:
 <localfile>
    <log_format>syslog</log_format>
    <location>/var/log/openvpnas.log</location>
  </localfile>
2. Restart the Wazuh agent service to apply the changes:
# systemctl restart wazuh-agent
Wazuh server
Decoding the OpenVPN access server logs
Wazuh includes out-of-the-box decoders written specifically for several log sources. You can customize existing decoders or create new decoders depending on the use case. In this case, custom decoders are created for identifying specific fields of interest from the openvpnas.log file. These fields include the timestamp, srcip,srcport, srcuser, action, and interface.
1. Add the decoders below to the local decoders file /var/ossec/etc/decoders/local_decoder.xml:
<decoder name="openvpnas_decoder">
    <prematch type="pcre2">\[OVPN \d+\] </prematch>
</decoder>

<decoder name="openvpnas_decoder_child">
    <parent>openvpnas_decoder</parent>
    <regex type="pcre2">(\d\d\d\d-\d\d-\d\d\w\d\d:\d\d:\d\d.\d\d\d\d)</regex>
    <order>timestamp</order>
</decoder>

<decoder name="openvpnas_decoder_child">
    <parent>openvpnas_decoder</parent>
    <regex type="pcre2">(\d+\.\d+\.\d+\.\d+):(\d+) \[(\S+)\]</regex>
    <order>srcip, srcport, srcuser</order>
</decoder>

<decoder name="openvpnas_decoder_child">
    <parent>openvpnas_decoder</parent>
    <regex type="pcre2">Peer Connection (\w+) with \[(\w+)\]</regex>
    <order>action, interface</order>
</decoder>
2. Restart the Wazuh manager to apply the changes:
$ sudo systemctl restart wazuh-manager
Creating custom rules for OpenVPN access server alerts
1. Add the following rules to the /var/ossec/etc/rules/local_rules.xml file:
<group name="Openvpnas">
  <rule id="100302" level="0" noalert="1">
    <decoded_as>openvpnas_decoder</decoded_as>
    <description>OpenVPN access server messages grouped</description>
  </rule>

  <rule id="100303" level="3">
    <if_sid>100302</if_sid>
    <match>Peer Connection Initiated</match>
    <description>OpenVPN remote connection established</description>
  </rule>
</group>
2. Restart the Wazuh manager to apply the changes:
$ sudo systemctl restart wazuh-manager
Testing the OpenVPN connection for publicly accessible servers
This section is for users that have configured a publicly accessible OpenVPN server. If you have a local setup (not publicly accessible), please skip this and proceed to the Log Injection section below.
Follow the steps below to connect to your VPN server.
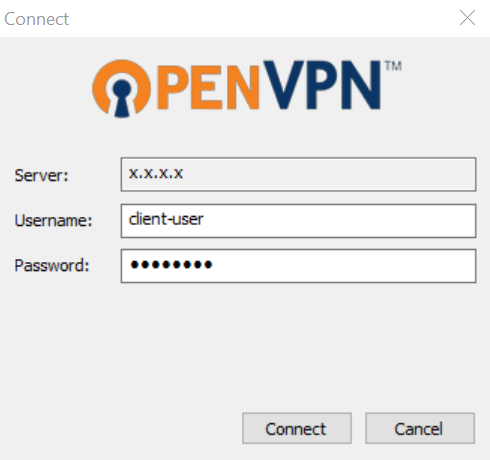
1. Copy the URL generated for the OpenVPN Client UI from the Installing OpenVPN access server section to the browser of your remote endpoint. Log in using the user profile created earlier. You can see a sample in the image below.

2. Select an installation file based on your platform.

3. Proceed with the installation steps and connect.
4. Click on connect and accept the connection prompt. An icon will appear, showing connection has been established.
Testing the OpenVPN connection for local servers
We use log injection to simulate OpenVPN connections for local testing scenarios. The logs provided below are sample logs to aid in testing this scenario on a local server not publicly accessible. These logs simulate a successful OpenVPN connection via the internet.
Take the following steps to inject logs on the Ubuntu Linux OpenVPN endpoint.
1. Save the test log into a file called injector:
$ echo “2023-01-12T14:59:53+0000 [stdout#info] [OVPN 4] OUT: '2023-01-12 14:59:53 82.132.184.219:9004 [client-user] Peer Connection Initiated with [AF_INET]82.132.184.219:9004 (via [AF_INET]10.0.0.110%enp0s3)'” >> injector

$ echo “2023-01-12T12:51:31+0000 [stdout#info] [OVPN 4] OUT: '2023-01-12 12:51:31 83.136.204.210:61013 [client-user] Peer Connection Initiated with [AF_INET]83.136.204.210:61013 (via [AF_INET]10.0.0.110%enp0s3)'” >> injector

$ echo “2023-01-12T12:41:11+0000 [stdout#info] [OVPN 4] OUT: '2023-01-12 12:41:11 52.72.26.11:50814 [client-user_AUTOLOGIN] Peer Connection Initiated with [AF_INET]52.72.26.11:50814 (via [AF_INET]10.0.0.110%enp0s3)'” >> injector

$ echo “2023-01-12T12:15:19+0000 [stdout#info] [OVPN 4] OUT: '2023-01-12 12:15:19 102.89.23.172:59280 [client-user] Peer Connection Initiated with [AF_INET]102.89.23.172:59280 (via [AF_INET]10.0.0.110%enp0s3)'” >> injector

$ echo “2023-01-11T19:45:37+0000 [stdout#info] [OVPN 4] OUT: '2023-01-11 19:45:37 102.89.23.223:52627 [client-user] Peer Connection Initiated with [AF_INET]102.89.23.223:52627 (via [AF_INET]10.0.0.110%enp0s3)'” >> injector
2. Inject the log into /var/log/openvpnas.log to trigger Wazuh alerts.
$ cat injector >> /var/log/openvpnas.log
Wazuh Dashboard
The following section will focus on identifying the OpenVPN connection alerts and setting up a dashboard to identify each connection made.
Verify OpenVPN alerts on the Wazuh dashboard
Take the following steps to verify that the connection made by the OpenVPN client triggers an alert on the Wazuh dashboard:
1. On your Wazuh dashboard, click on the Discover tab.

2. Filter the rule.id field to 100303. As seen in Fig 8, the GeoLocation.location field automatically populates itself by showing the coordinates of the identified public IP address.

Creating a visualization dashboard for OpenVPN access server connection alerts.
Follow the steps below to create a dashboard for your OpenVPN alerts.
1. On your Wazuh dashboard, click on Visualize.
2. From the Visualization dashboard, click on Create visualization.
3. Select Coordinate map.
4. Select wazuh-alerts-* as a source for the Coordinate map.

5. Select the following options for Metrics and Buckets.

6. Click on the Options tab and set your indicator/markers per preference. Click on Update to apply your changes.

7. Add a filter for rule 100303 and save the dashboard using the Save button at the top right corner.

The image below shows the location of all OpenVPN-connected users.

The map above shows the users connected from the United States, the United Kingdom, and Nigeria. An organization with a geographically distributed workforce should be alarmed to see a VPN connection from a country without a presence. In our example above, we can see a fourth connection from the Czech Republic. Such an indicator can mean an account compromise may have occurred on an authorized VPN user.
Conclusion
In this blog post, we used logs from the OpenVPN access server-client connections to show connected user locations. We used the Wazuh agent to forward logs from the OpenVPN access server to the Wazuh server. Next, we created decoders and rules for the OpenVPN connection alerts to identify the connected OpenVPN user’s location. Finally, we created a dashboard that shows the coordinates of the identified OpenVPN client.
The scenario created for this blog post specifies OpenVPN as the VPN service provider. Similar integrations with other VPN service providers can be implemented with Wazuh. The Wazuh Log data analysis engine provides the capability necessary to decode logs from multiple sources. Having this functionality in your company gives you an extra perspective that may be used to track VPN usage trends that might point to a compromised account.
Wazuh is a free XDR solution. Our large community provides daily support for users. Wazuh can be deployed on-premises or as a cloud solution using the Wazuh cloud. To stay up to date with the work we do, check out our website.