Wazuh is an open source security solution that can be used for security data collection, threat detection, file integrity monitoring, endpoint protection, incident response, and compliance. The Wazuh agent is a monitoring software deployed to endpoints to provide security visibility.
In this blog post, we’ll learn how to deploy the Wazuh agent to multiple Windows endpoints using PDQ Deploy. PDQ Deploy is a deployment tool built to help automate the deployment of software and scripts as well as for making system changes.
Prerequisites
To install the Wazuh agents using PDQ Deploy, it is necessary that the following requirements are in place:
- PDQ Deploy installed on the deployment machine.
- A functional Wazuh manager. The installation guide is here.
- The Wazuh agent installer. The Windows installer can be downloaded here.
- Administrator credentials for PDQ Deploy. These credentials are required for PDQ Deploy to perform installations on the endpoint. The credentials may be local administrators on the endpoints or domain administrators. For more details on configuring PDQ Deploy, please see the support guide.
- Connectivity between the deployment machine and the endpoints.
Configuring the Wazuh agent deployment PDQ package
Once the above prerequisites are fulfilled, we can proceed to create a Wazuh agent deployment package in PDQ Deploy following the steps below:
1. Run the PDQ Deploy tool.
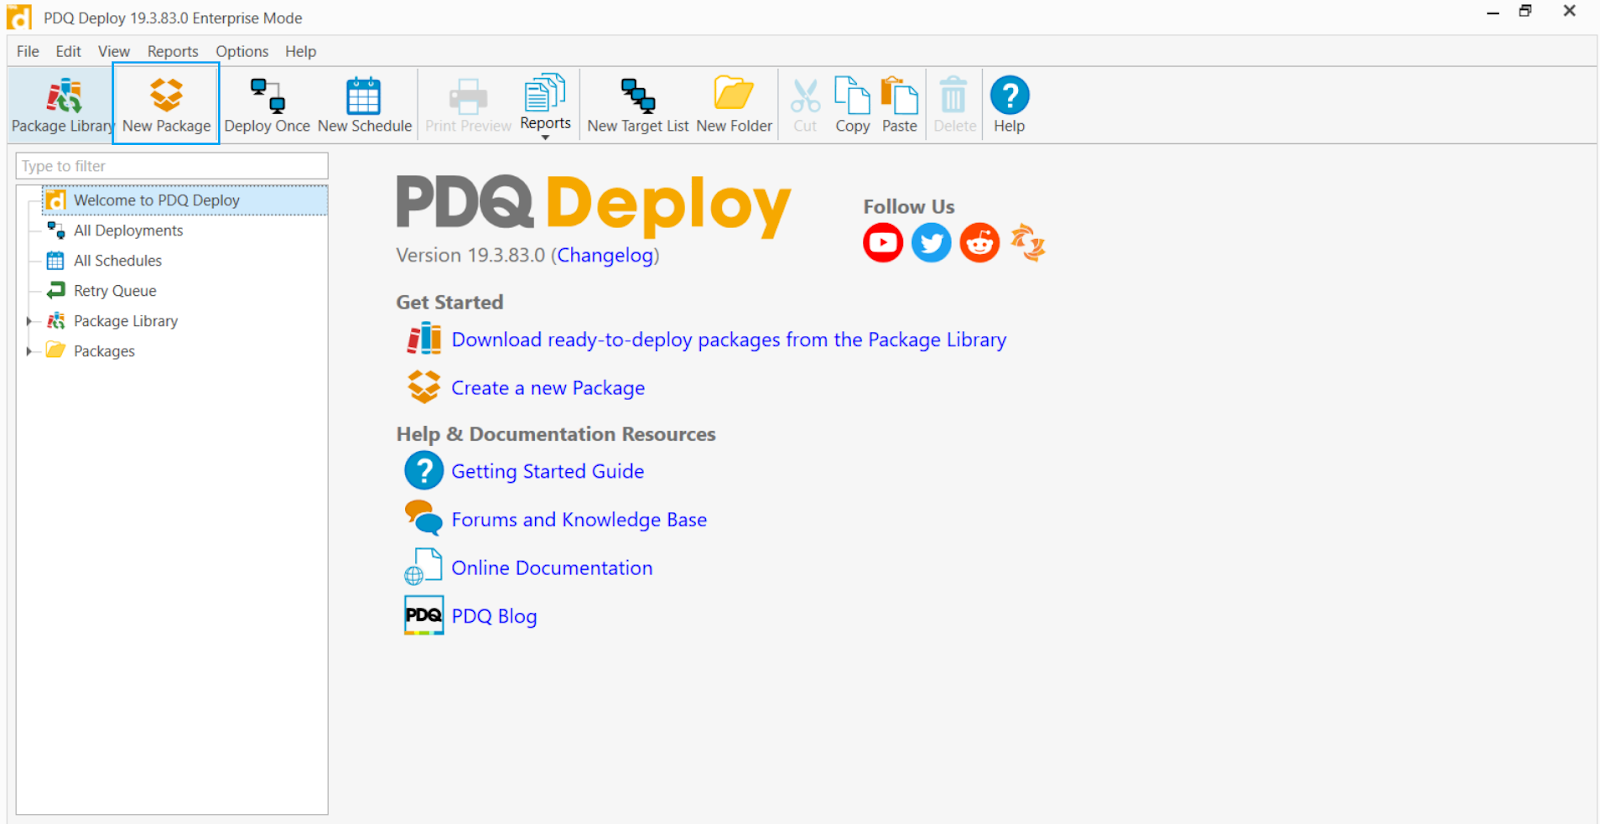
2. Select the new package option.

3. Specify the package name and description in the properties section.
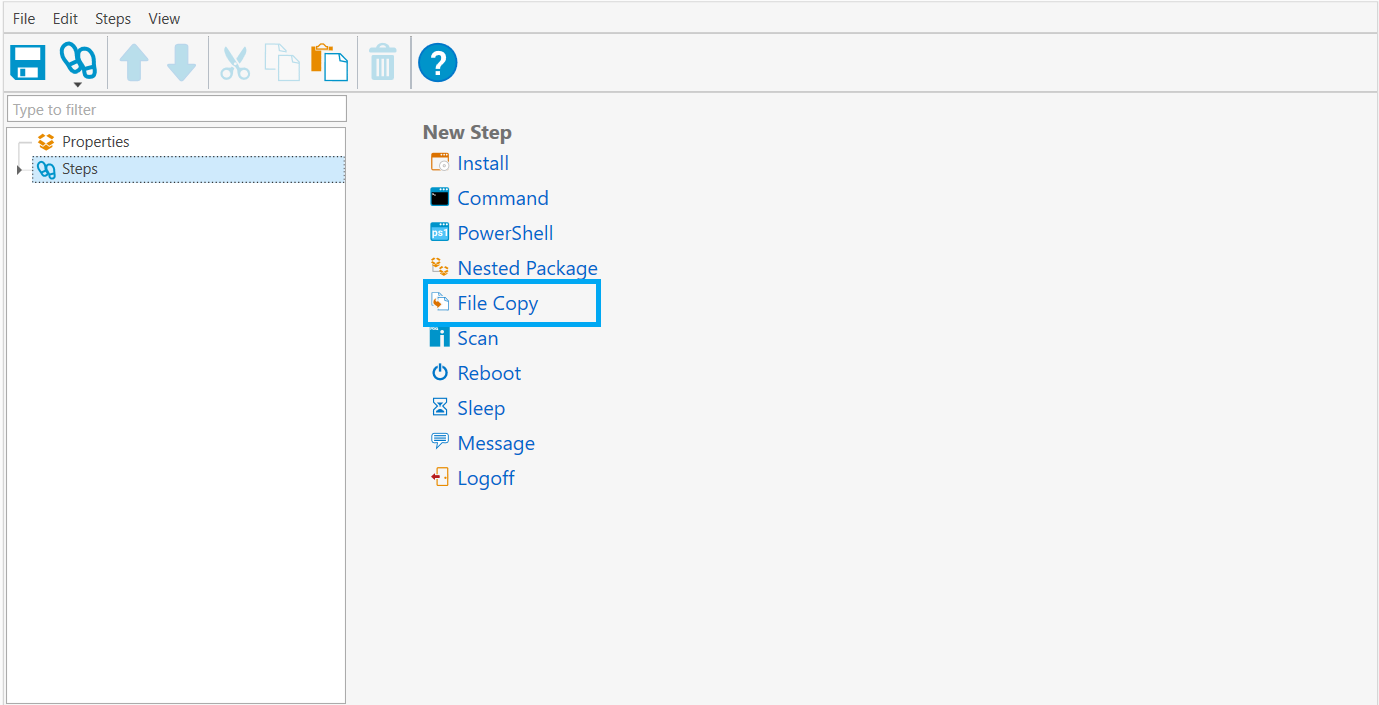
4. Proceed to add File Copy as the first deployment step.
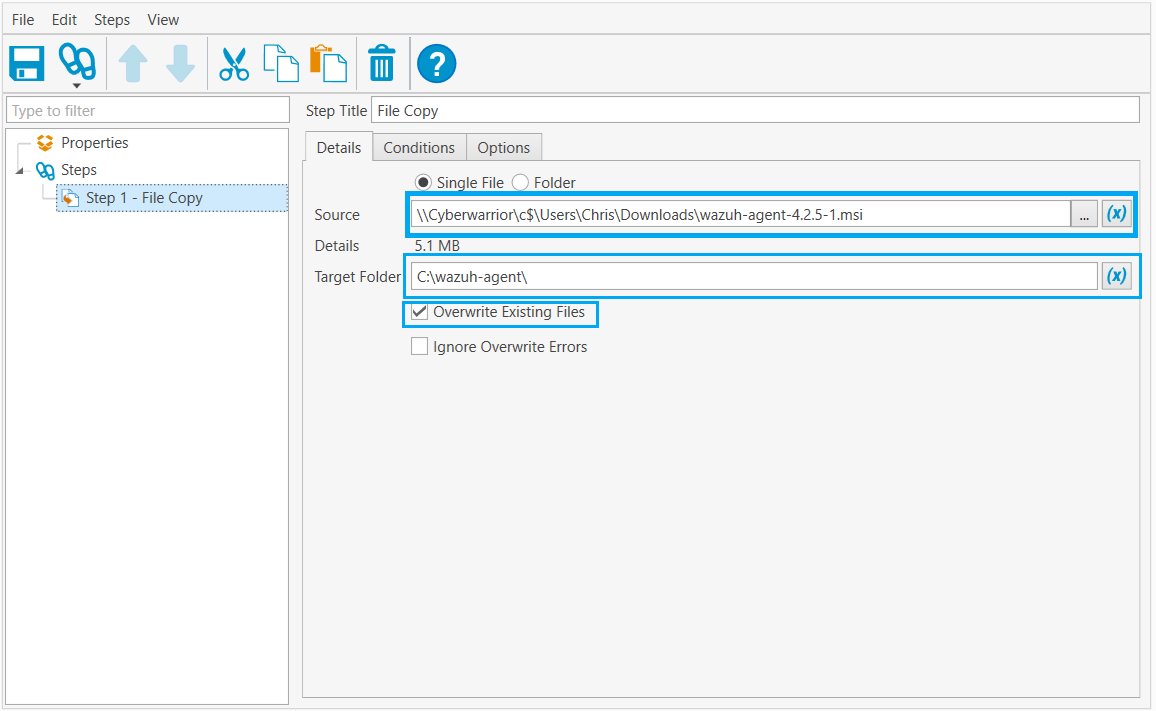
In this step, we will copy the Wazuh agent installer to the target machines:
- In the
Sourcefield, select the Wazuh agent installer file from its location on the deployment machine. - Then, we proceed to specify a destination path on the target endpoints in the
Target Folderfield. In this article, we use a target path ofC:\wazuh-agent. - Overwrite existing files is also recommended to ensure that the latest agent is the one present on the target machines.
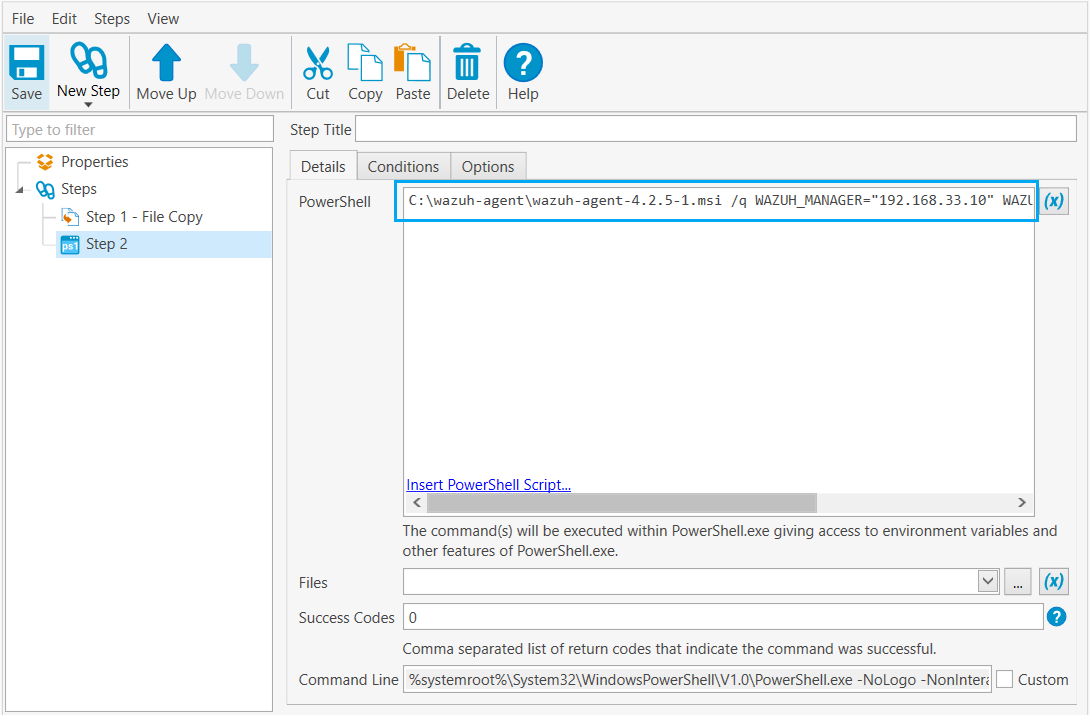
5. The second deployment step will be a PowerShell command to run the Wazuh agent installation command with environment variables specified.
The PowerShell basic installation command is:
# <path_to_wazuh_agent_installation_file> /q WAZUH_MANAGER="<manager_ip>" WAZUH_REGISTRATION_SERVER="<registration_server_ip>"
Where:
<path_to_wazuh_agent_installation_file>is the destination path where the Wazuh agent was copied to on the endpoint.<manager_ip>is the Wazuh manager IP address.<registration_server_ip>is the Wazuh registration server IP address. When there is only one Wazuh manager, the manager IP and the registration IP addresses are the same.
Note that other deployment variables here may be used in the PowerShell installation command.
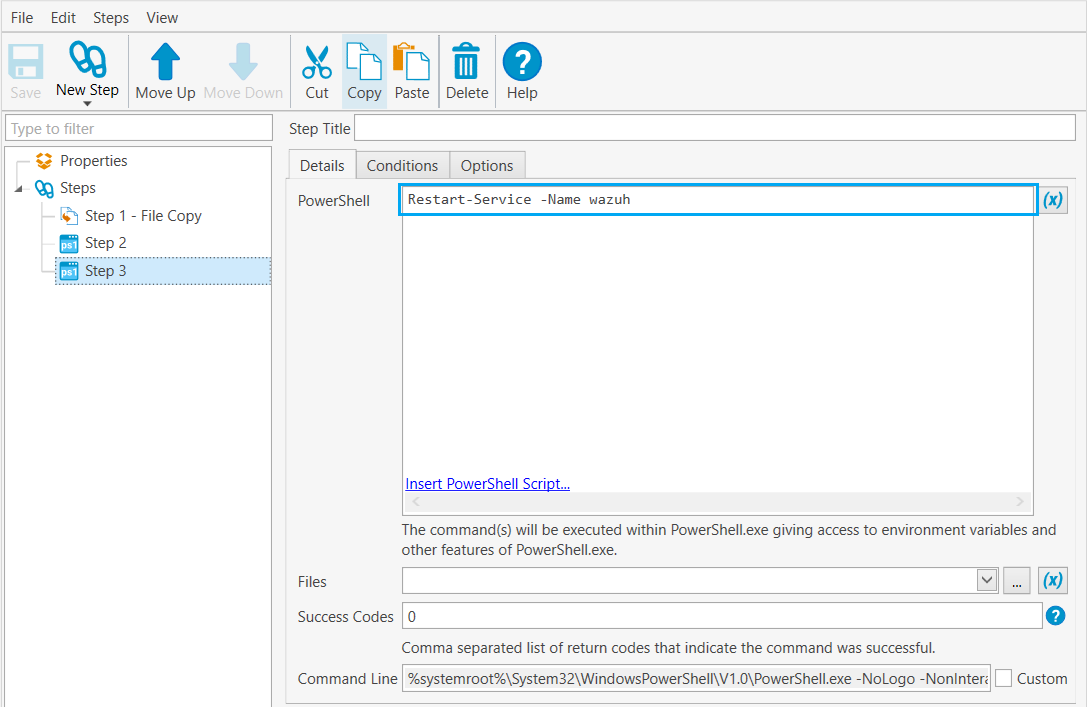
6. We use a PowerShell command to restart the Wazuh agent service.
# Restart-Service -Name wazuh
Wazuh supports automatic agent enrollment to an already existing Wazuh manager. This feature allows the agents to get their own key automatically. It also supports the recovery of enrolled agents, and communication if the manager deletes, loses, corrupts, or replaces the agent keys file. See more about Wazuh Agent enrollment here.
Deploying the Wazuh agent package to the endpoints
Now that the Wazuh agent PDQ package has been created, we can proceed to deploy the package to our target endpoints.
1. Prepare a .txt file with the IP addresses or hostnames of the target endpoints. Each IP address has to be on a single line. The entries in the text file would look like this:
192.168.33.23192.168.33.24
2. Select the prepared Wazuh agent package, then choose the Deploy Once option.
3. Select Choose targets and select the .txt file with the endpoints list created in step 1. This will populate the Deployment target list.
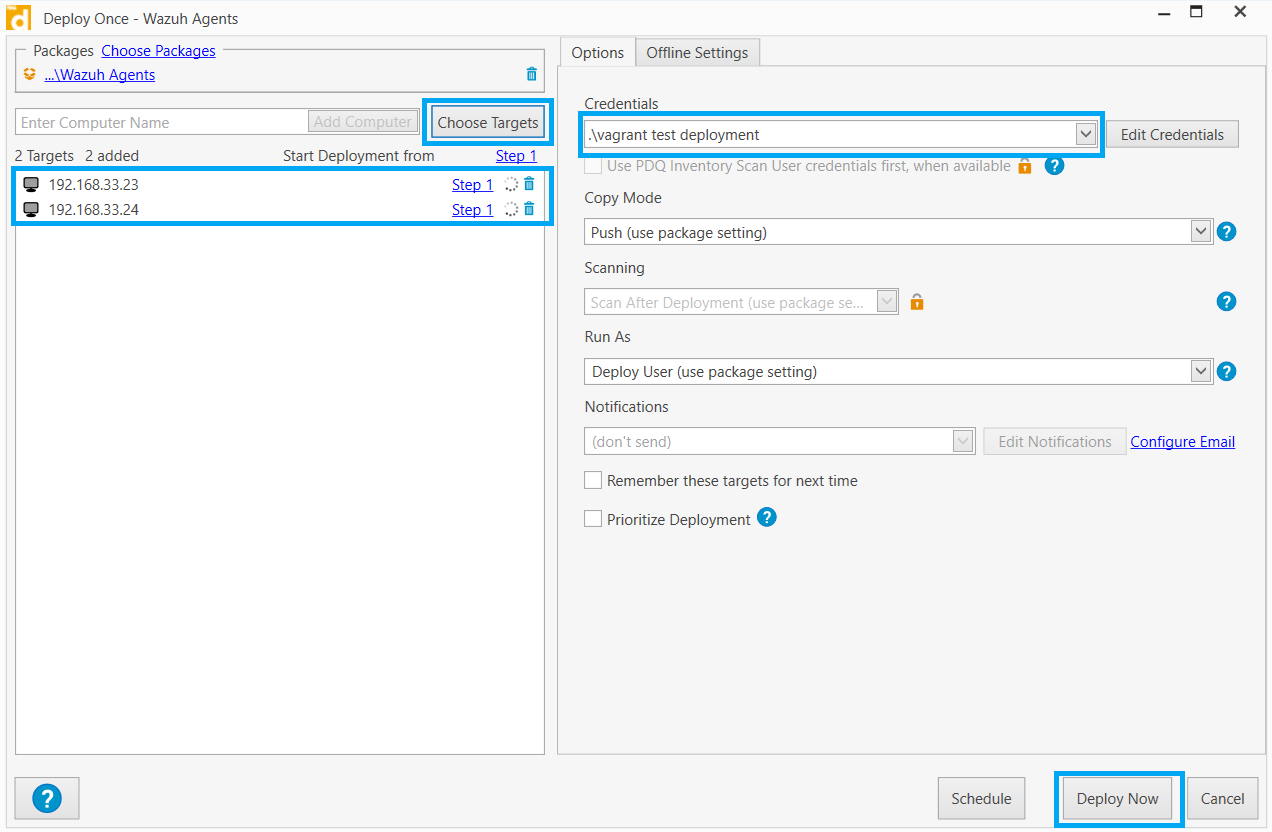
4. Select the deployment credentials for the endpoints then click Deploy Now. More information on configuring deployment credentials for PDQ Deploy can be found here.
Once the Deploy Now button is clicked, the deployment of the Wazuh agent package to the target endpoints commences.
The status of the deployment can be monitored from the PDQ deployment dashboard.
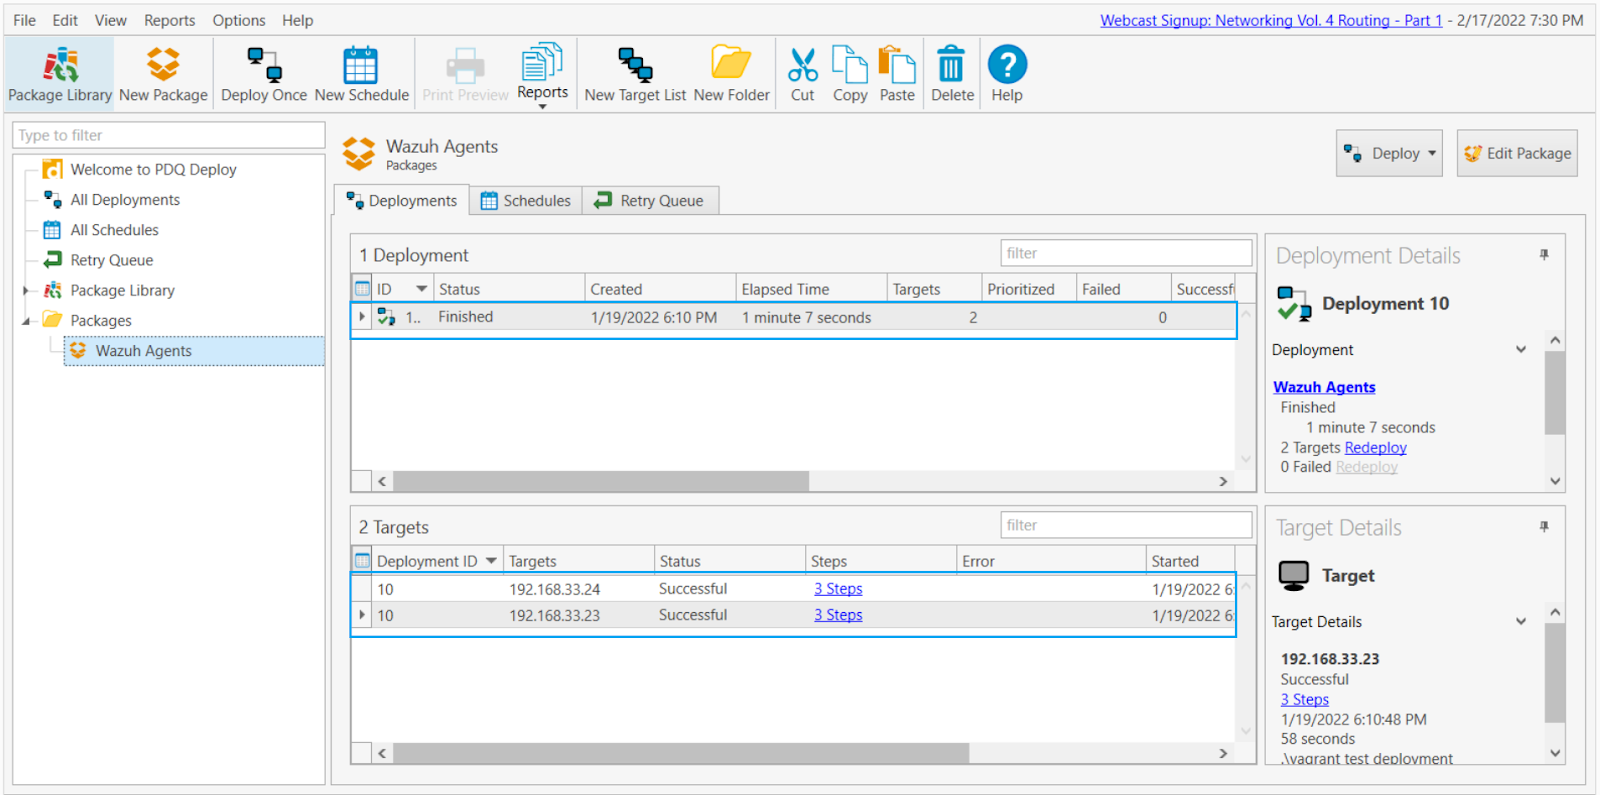
After a few minutes, we’ll see that the deployment of the Wazuh agents was completed successfully. We can now proceed to check the Wazuh dashboard to see the newly enrolled agents.
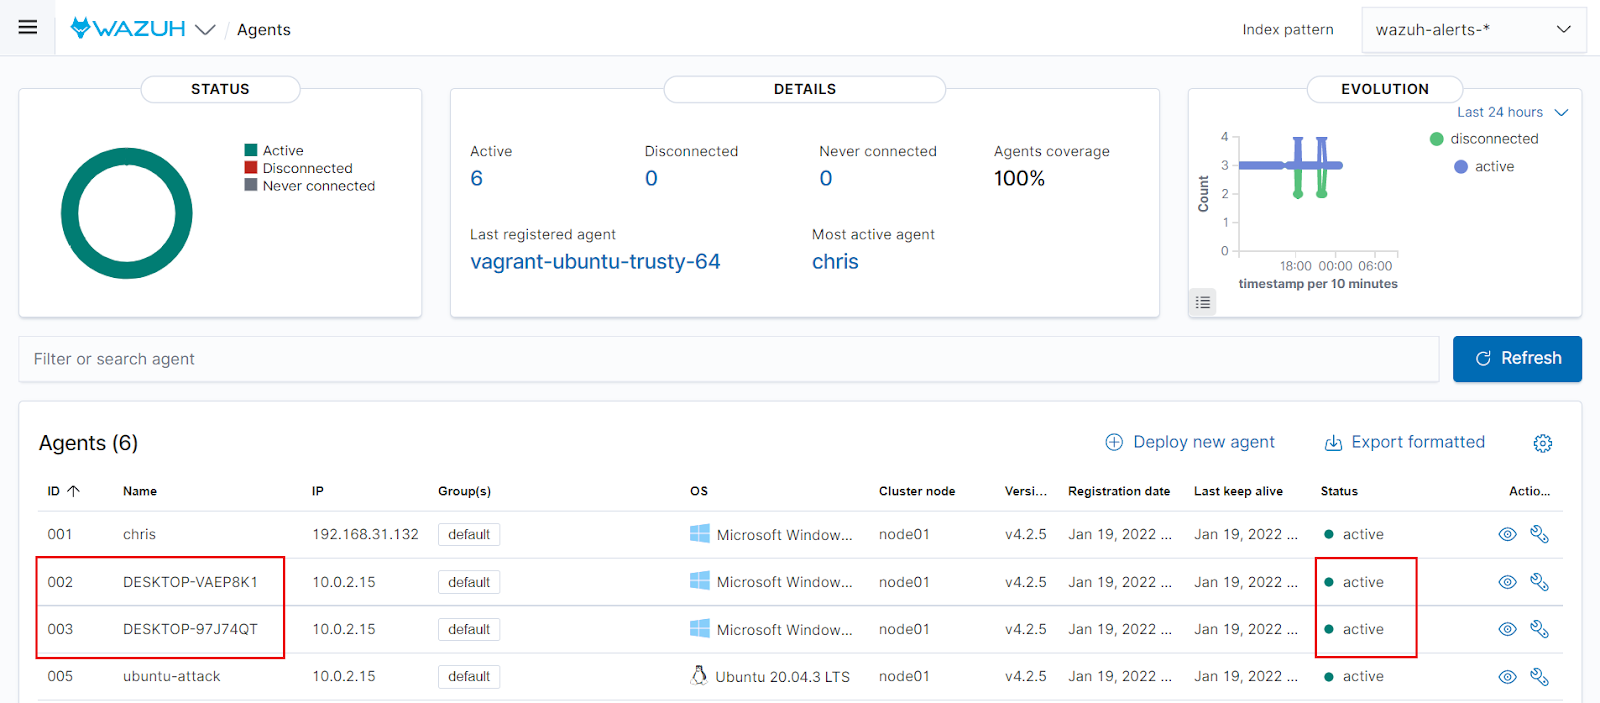
From the screenshot above, we can see they successfully enrolled and are active.
Conclusion
In this article, we learned how to prepare Wazuh agents to be deployed at scale to Windows targets in enterprise environments using PDQ Deploy. This will be useful for mass deployment of agents to endpoints for threat detection, monitoring, and protection. Modules on the deployed agents can subsequently be configured using centralized configuration. Wazuh also offers the ability to deploy the agents using GPO in an active directory environment.